At Cloud Sultans, our mission is to help small and large businesses to better collaborate and achieve high productivity with their teams by maximizing the power of Google Workspace (formerly GSuite).
When you install the standard Google Tag on your site, Google Analytics 4 automatically captures a handful of basic interactions—page views, scroll depth, file downloads, outbound link clicks, and a few more. While this is a solid start, you’re only scratching the surface of what Google Analytics can really do. To unlock deeper insights, you need to go beyond defaults and start using custom event tracking through Google Tag Manager (GTM). This allows you to track highly specific user actions, giving you the clarity to make smarter business and design decisions.
Why Custom Events Matter
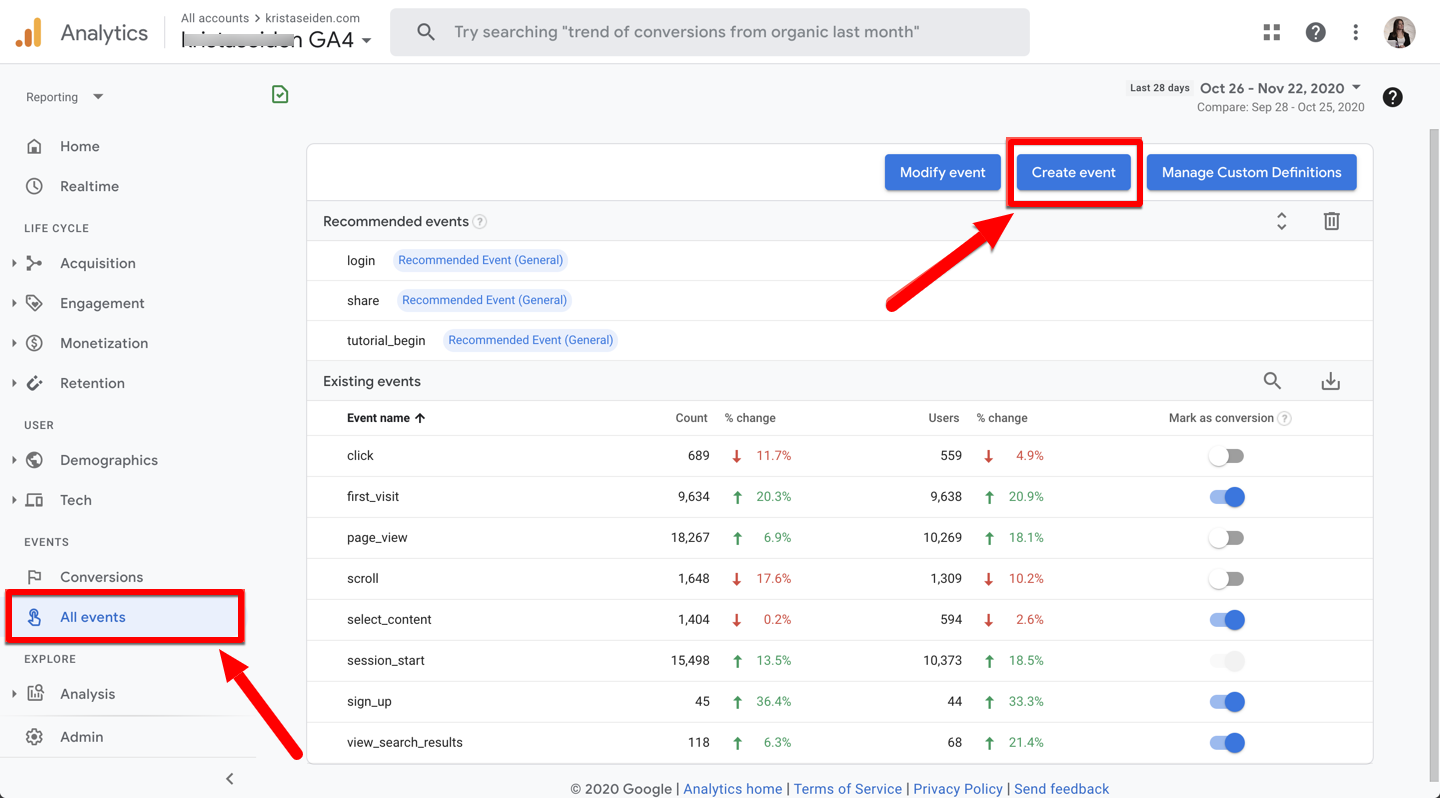
In Google Analytics, events are the heartbeat of your analytics. Google automatically collects some events (like session starts or user engagement) and offers “enhanced measurement” for common actions. Beyond that, Google provides a list of recommended events—standardized names for e-commerce actions, form submissions, and more.
But what if you want to track something unique, like which menu item your visitors click most often? That’s where custom events come in. You can define your own event names, choose what parameters to capture, and tailor everything to your business goals. For example, tracking menu clicks could reveal which sections of your site are most valuable to visitors, helping you prioritize content or restructure navigation.
Understanding Event Naming Best Practices
Custom events in Google Analytics give you the freedom to name your events anything you like—but that doesn’t mean you should go wild with naming. Following Google Analytics’ naming conventions helps keep your data organized and avoids future headaches.
Use lowercase letters and underscores instead of spaces—for example, menu_link_click instead of Menu Link Click. For e-commerce and other Google-recommended events, stick to the exact names Google specifies (e.g., purchase, add_to_cart) to ensure metrics populate correctly.
Setting Up a Trigger in Google Tag Manager
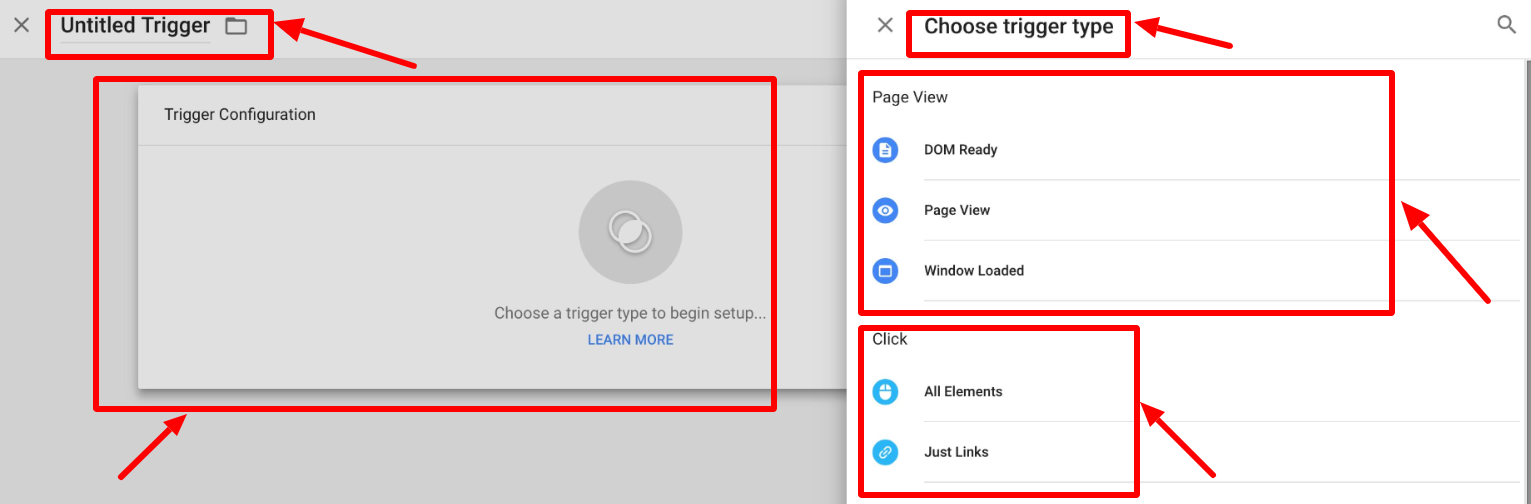
In Google Tag Manager, a trigger defines when your tag should fire. To track menu clicks, you first create a trigger that detects link clicks. Start with an “All Link Clicks” trigger, then refine it so it only fires when a menu link is clicked.
For example, if your menu links share the same CSS class, such as menu-link, you can set your trigger to fire only when the clicked element’s class contains menu-link. This ensures you’re tracking relevant actions and not every single link click on the page.
Enabling Click Variables
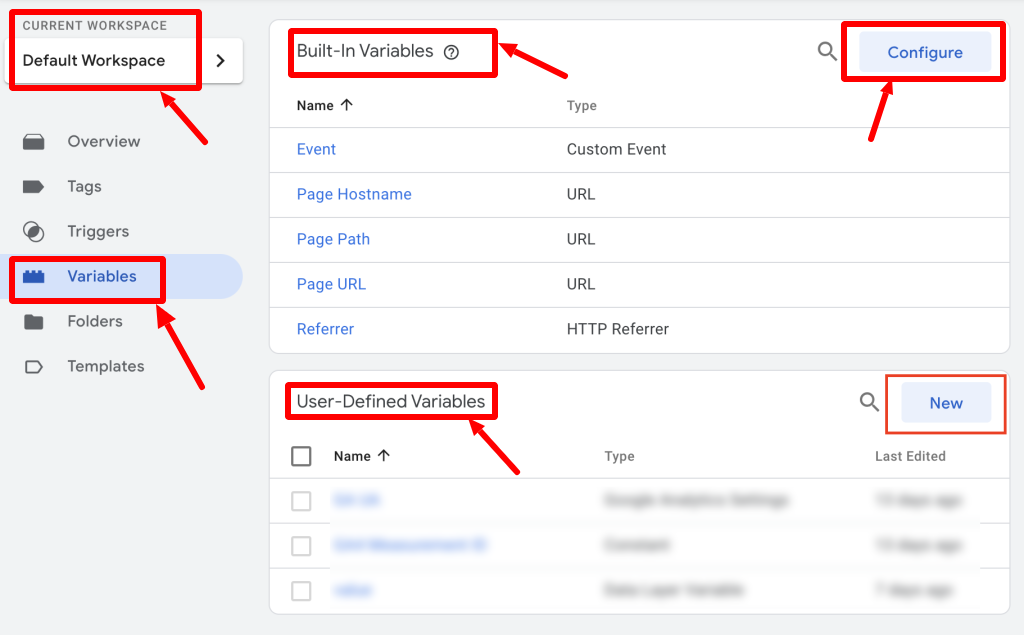
Triggers rely on variables—pieces of information Google Tag Manager uses to decide when and what to track. By default, GTM doesn’t collect click-specific variables. To fix that, head to Variables in Google Tag Manager, click Configure, and enable all the click-related variables, such as Click Text and Click URL.
Once enabled, these variables will dynamically capture details like the exact text on the link or its destination URL. That’s crucial if you want to see which specific menu items are most popular.
Refining the Trigger for Precision

If your trigger is set to “All Link Clicks,” you’ll capture a lot of noise—things like footer links, sidebar links, or any other clickable element. Refining your trigger is the key to precision.
By targeting only links with a certain class, ID, or pattern in their URL, you ensure your Google Analytics data reflects the specific interaction you care about. For menu tracking, this means capturing only clicks on navigation items, filtering out unrelated interactions.
Creating the Google Analytics Event Tag

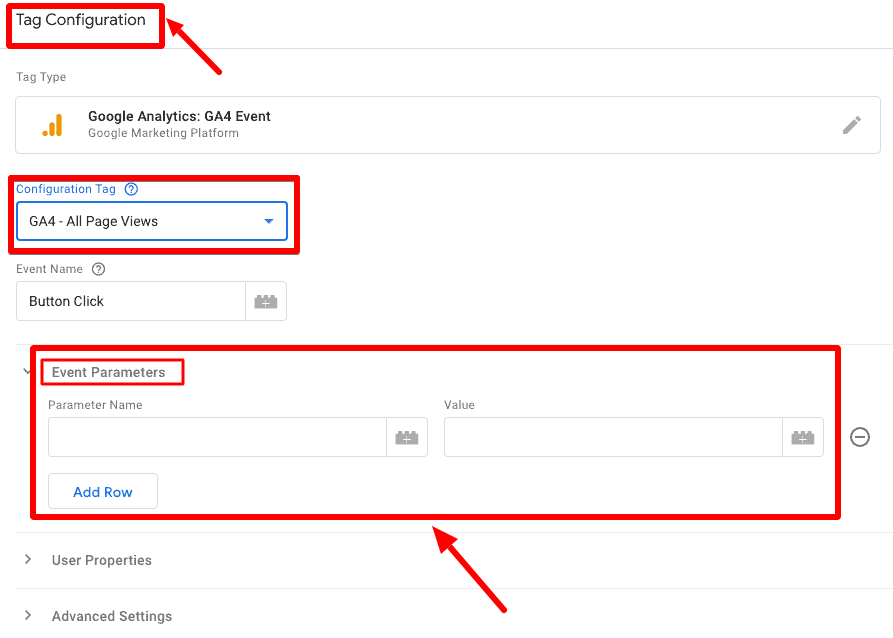
Once the trigger is ready, it’s time to create the Google Analytics Event Tag. This tag will send your custom event data to Google Analytics. In Google Tag Manager, choose the Google Analytics Event tag type, enter your Google Analytics measurement ID, and name your event (e.g., menu_link_click).
This is also where you can send event parameters—extra bits of information that enrich your event data. For menu clicks, you might send link_text and link_url. These parameters tell you exactly which menu item was clicked and where it leads.
Using Dynamic Variables for Parameters
One of Google Tag Manager’s strengths is its ability to pull in variable values dynamically. Instead of hardcoding a menu item name, use the Click Text variable for link_text and the Click URL variable for link_url.
This approach means your event data stays accurate even if you update your menu items in the future—no need to reconfigure Google Tag Manager every time your navigation changes.
Testing Your Setup in Preview Mode
Before publishing your changes, use Google Tag Manager’s Preview Mode to test. Click through your menu items and watch in the Tag Assistant to ensure your tag fires only for the intended clicks.
If the setup is correct, you’ll see your event name and parameters in real-time. This testing phase is critical—it’s far easier to fix configuration issues before your tag goes live than after.
Verifying Events in Google Analytics Debug View
After confirming in Google Tag Manager, head to Google Analytics’ Debug View to verify that events are being received correctly. You should see your custom event (menu_link_click) along with the parameters (link_text and link_url).
Keep in mind, some events may take time to appear in standard Google Analytics reports—sometimes up to 48 hours. Debug View, however, shows them instantly, giving you confidence that tracking is working as intended.
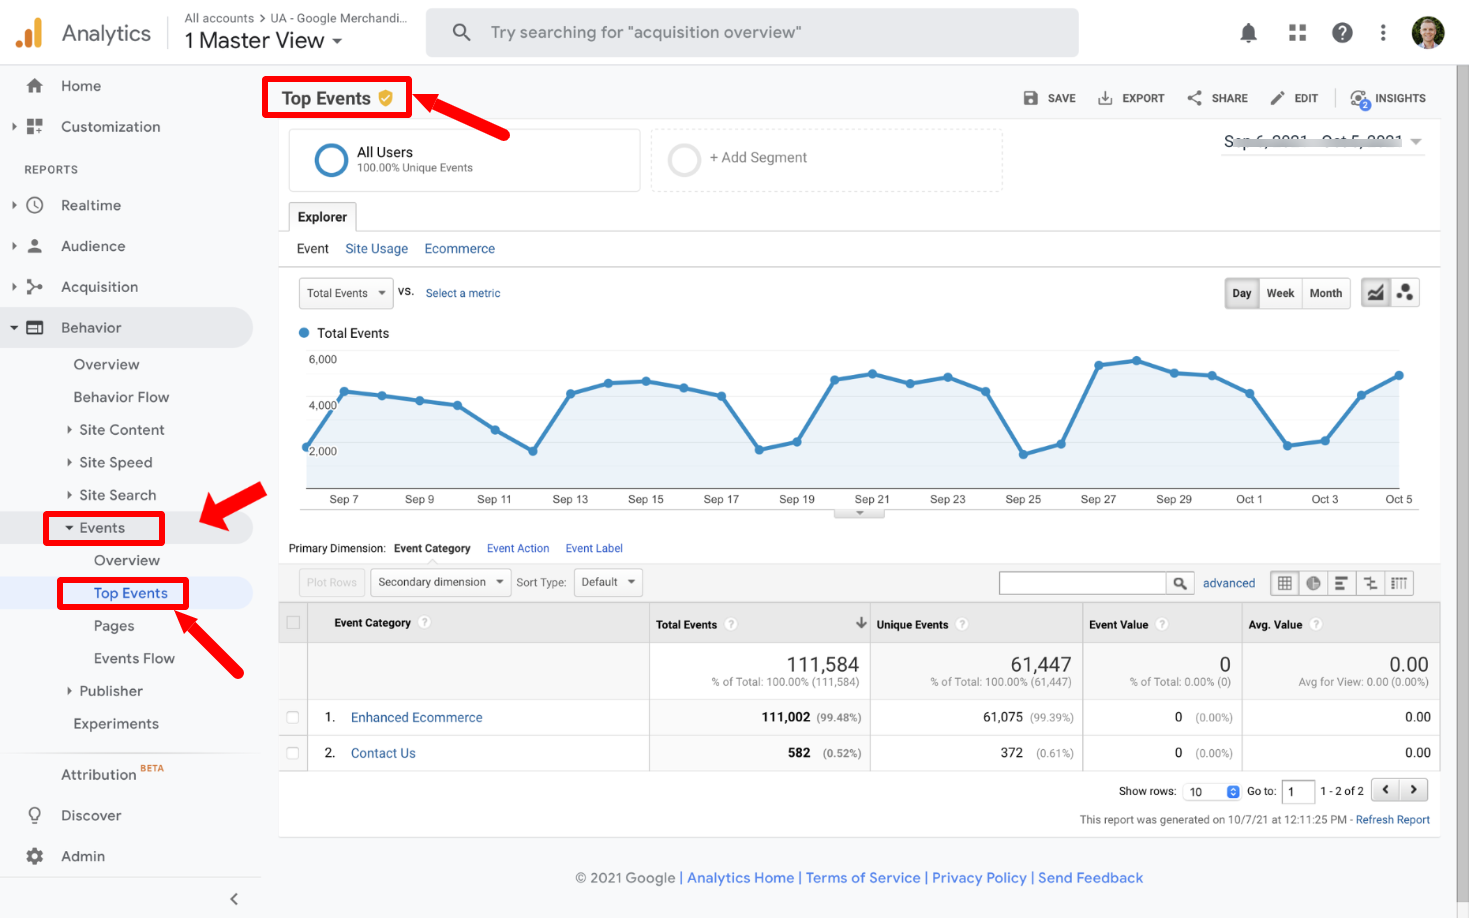
Building Reports to Analyze Menu Clicks

Once your data flows into Google Analytics, you can build reports or explorations to analyze it. Filter your events by event_name = menu_link_click and add link_text and link_url as dimensions. Then, use metrics like event count and total users to see which menu items attract the most clicks.
This insight is powerful—it can guide design tweaks, content prioritization, and even A/B tests to boost engagement.
Publishing Your Google Tag Manager Changes
Once everything is tested and verified, publish your Google Tag Manager container. From that moment on, every qualifying menu click will be tracked in Google Analytics. This setup not only gives you richer analytics but also creates a foundation for tracking other custom events on your site.
Taking Custom Tracking Further
Menu clicks are just one example of what’s possible. You can use the same Google Tag Manager+Google Analytics custom event framework to track almost anything—button clicks, video plays, form submissions, or even engagement with specific page elements. The more granular your tracking, the more actionable your insights will be.
Any questions, comments, or reactions about our article, we’re happy to hear that in the comment section below. We always love diving into healthy discussions. If you also feel that you haven’t been using Google Workspace at its best, reach us at (https://cloudsultans.com).
We offer free consultation or system audit to find you the best possible solution.