At Cloud Sultans, our mission is to help small and large businesses to better collaborate and achieve high productivity with their teams by maximizing the power of Google Workspace (formerly GSuite).
Venturing into the world of Google APIs might sound intimidating at first—especially if you’re unfamiliar with cloud services. But rest assured, once you understand the basics, it opens up an ecosystem full of possibilities. Whether you’re looking to automate Gmail tasks, manipulate Google Sheets, access your YouTube channel programmatically, or analyze web traffic with Google Analytics, Google APIs offer robust tools to make that possible.
This article will guide you through getting started with Google APIs, step by step, as explained by Jie Jenn in his YouTube tutorial. We’ll cover everything from project setup to authentication, making it easy to follow even if you’ve never touched Google Cloud before.
Understand the Power of Google APIs
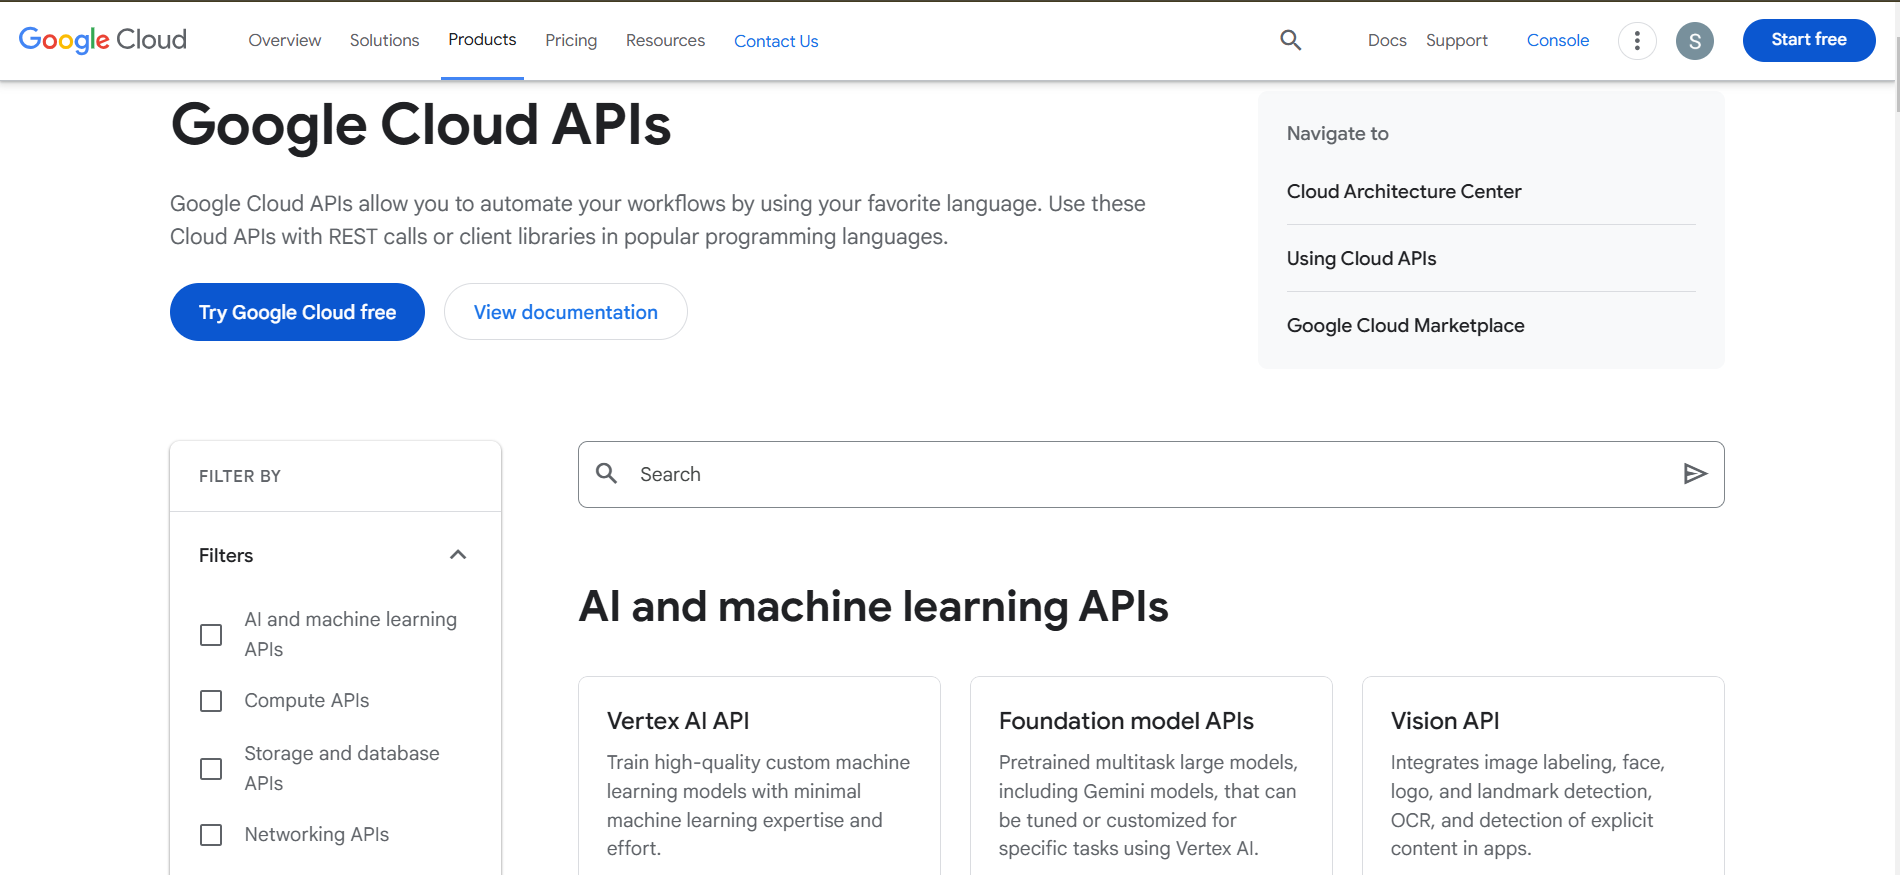
Google offers a wide variety of APIs that cater to both general users and advanced developers. These include tools for AI (like Vision AI and Speech-to-Text), and core Google services like Gmail, Google Sheets, Drive, Calendar, and YouTube. The flexibility and reach of these APIs make them invaluable for businesses looking to streamline operations, automate workflows, or build custom integrations.
The great part? Most services include generous free tiers. Jie Jenn highlights that after three years of consistent use, his Google Cloud bill is still under $5—a clear sign that Google APIs are not just powerful, but also cost-effective for small businesses and solo developers.
Step 1: Create Your First Google Cloud Project
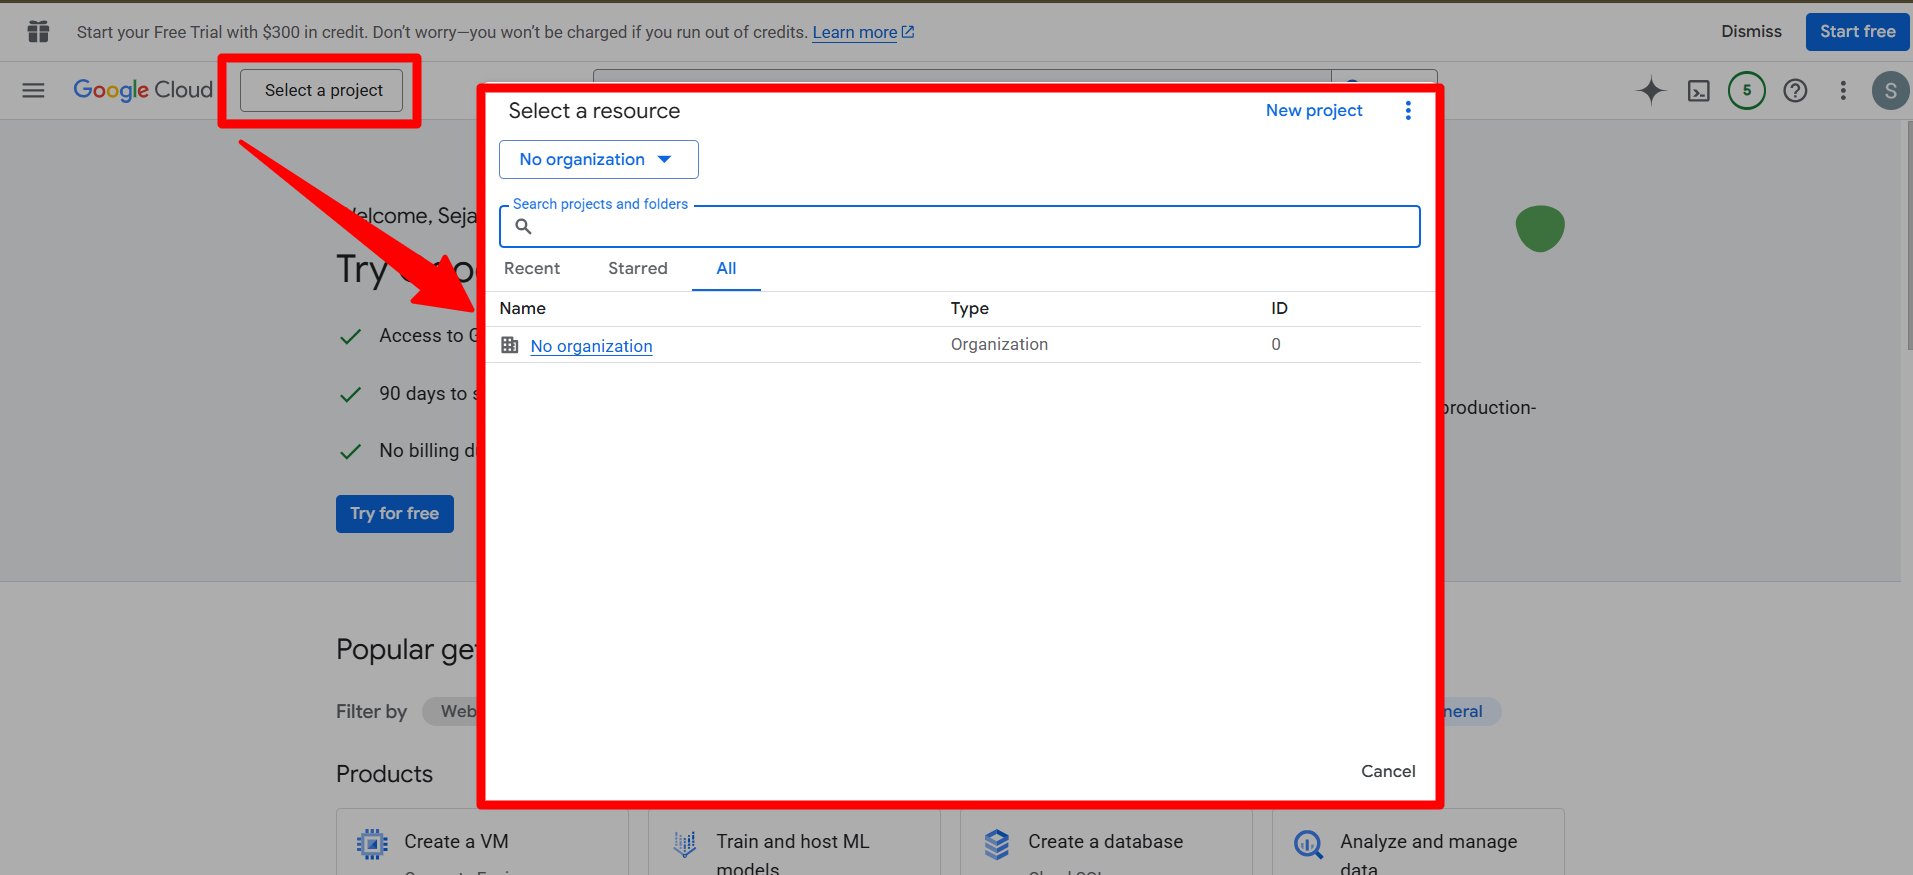
Before accessing any Google API, you must create a project within the Google Cloud Console. Each project serves as a container for API settings, credentials, and usage monitoring.
To begin, navigate to console.cloud.google.com. On the top menu, click the project dropdown and select “New Project.” Give your project a name (e.g., “Yellowstone”), and Google will set it up within seconds. Every API you enable and every credential you generate will live inside this project environment.
This step is foundational. Having your APIs isolated per project helps manage billing, access control, and security in a clean and structured way.
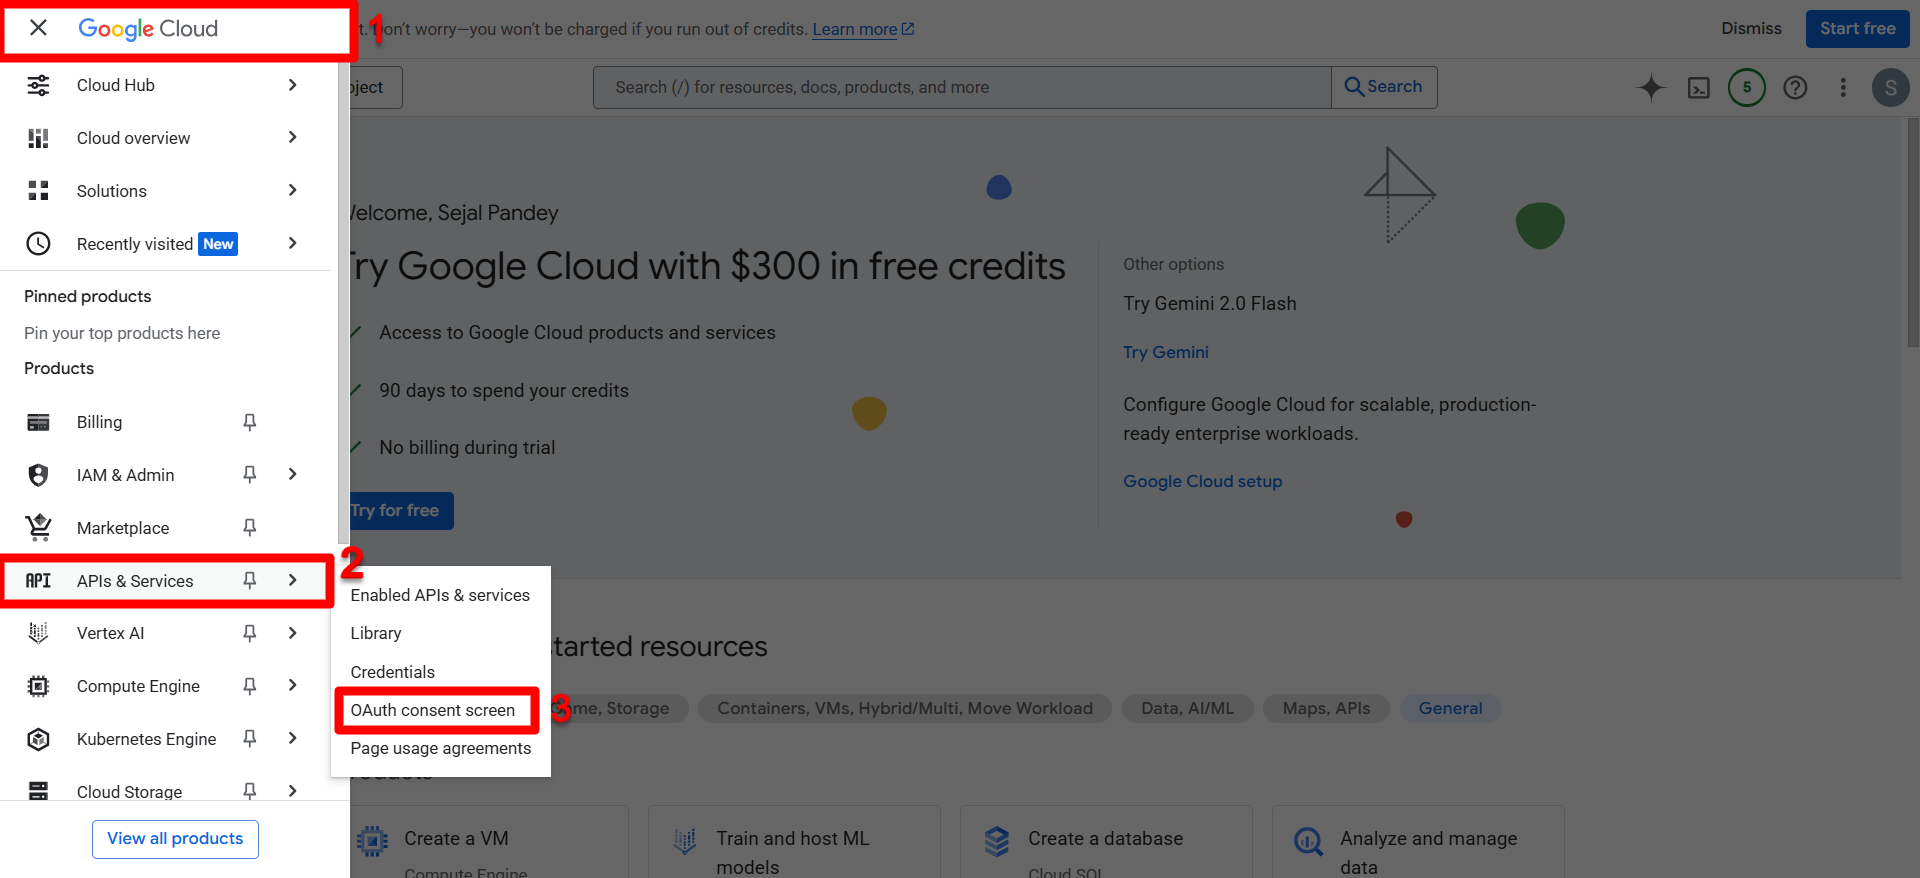
Step 2: Set Up Your OAuth Consent Screen
Before your app can request sensitive data—like email content or YouTube playlists—it must go through the OAuth 2.0 consent process. This ensures transparency for users and gives them control over the data your app can access.
From the navigation menu, go to APIs & Services > OAuth Consent Screen. Choose “External” as the user type if third-party users will interact with your app. Then, name your app (e.g., “JJAP Demo”), enter a support email, and optionally upload an app logo.
You’ll also need to input a developer contact email to receive alerts about your project. For automation or internal use, you can leave fields like homepage or privacy policy URL blank. Google allows you to define the permission “scopes” later in the script itself, so you can safely skip those for now.
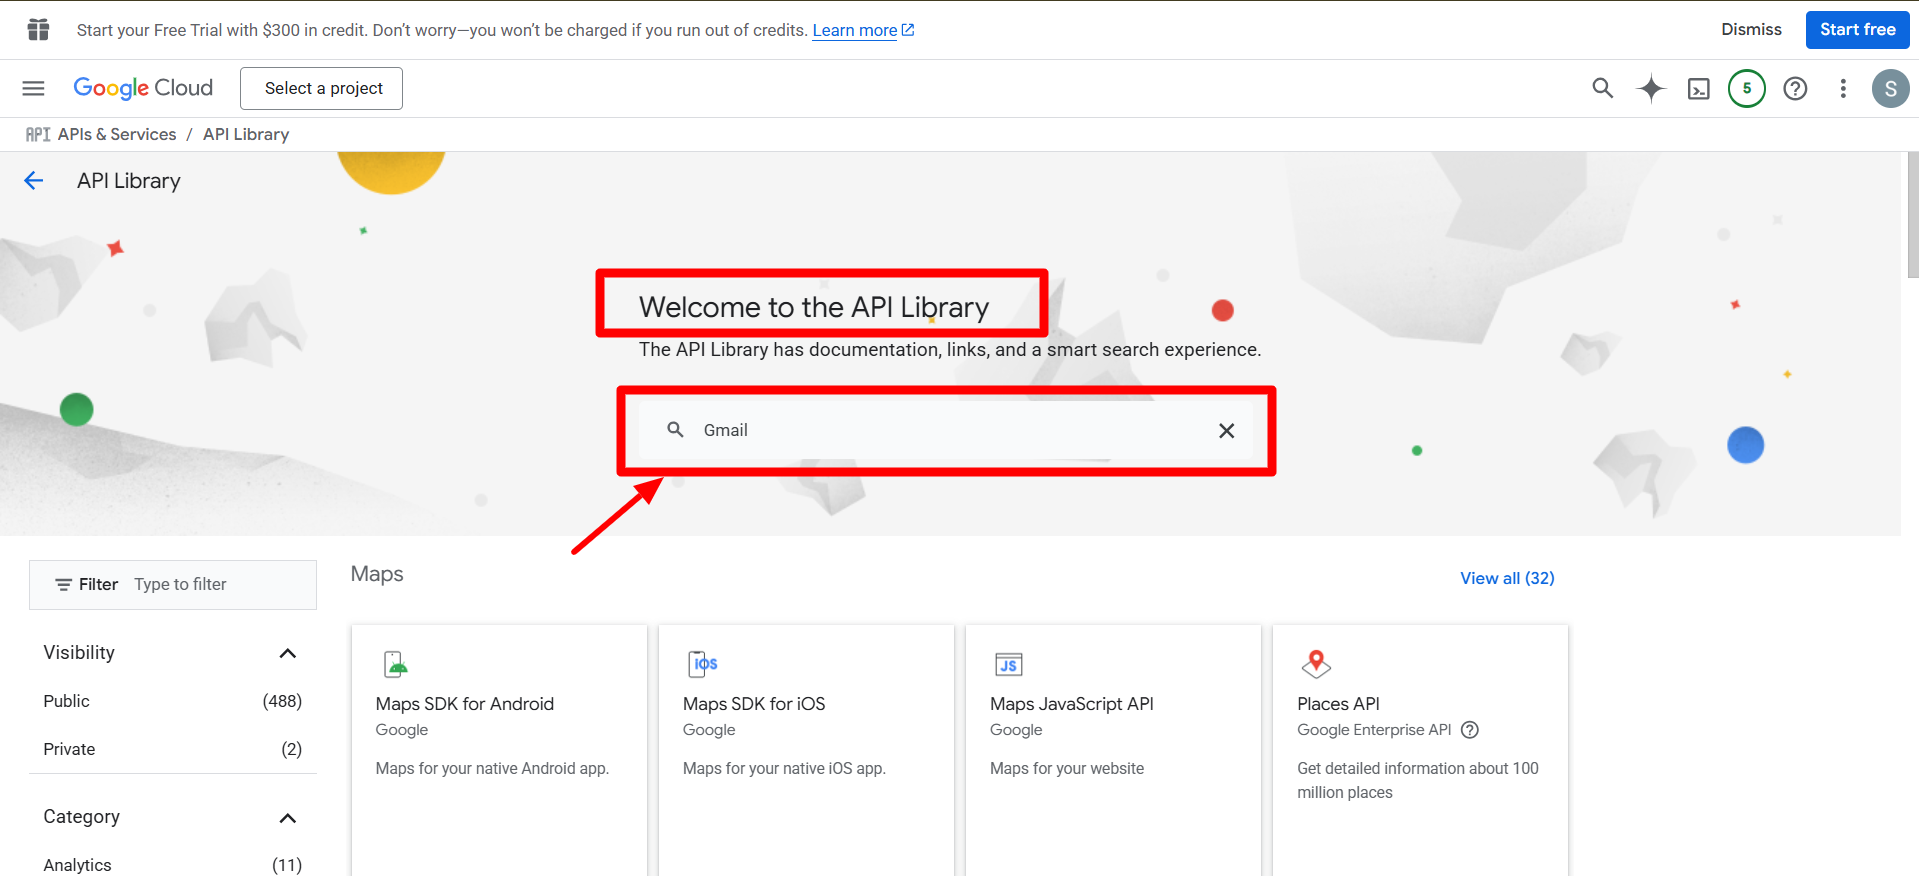
Step 3: Enable the APIs You Want to Use
Now comes the fun part—activating the APIs. From the Cloud Console, go to APIs & Services > Library. Here, you’ll find hundreds of APIs sorted by categories like Google Workspace, Maps, Machine Learning, and more.
Use the search bar to locate the specific API you need. For example, typing “Gmail” will display all Gmail-related APIs. Click on Gmail API, then hit Enable. Repeat this step for others like Google Sheets API, YouTube Data API, or Google Drive API depending on your project goals.
Enabling only the APIs you need improves performance, keeps your project clean, and avoids unexpected quota consumption.
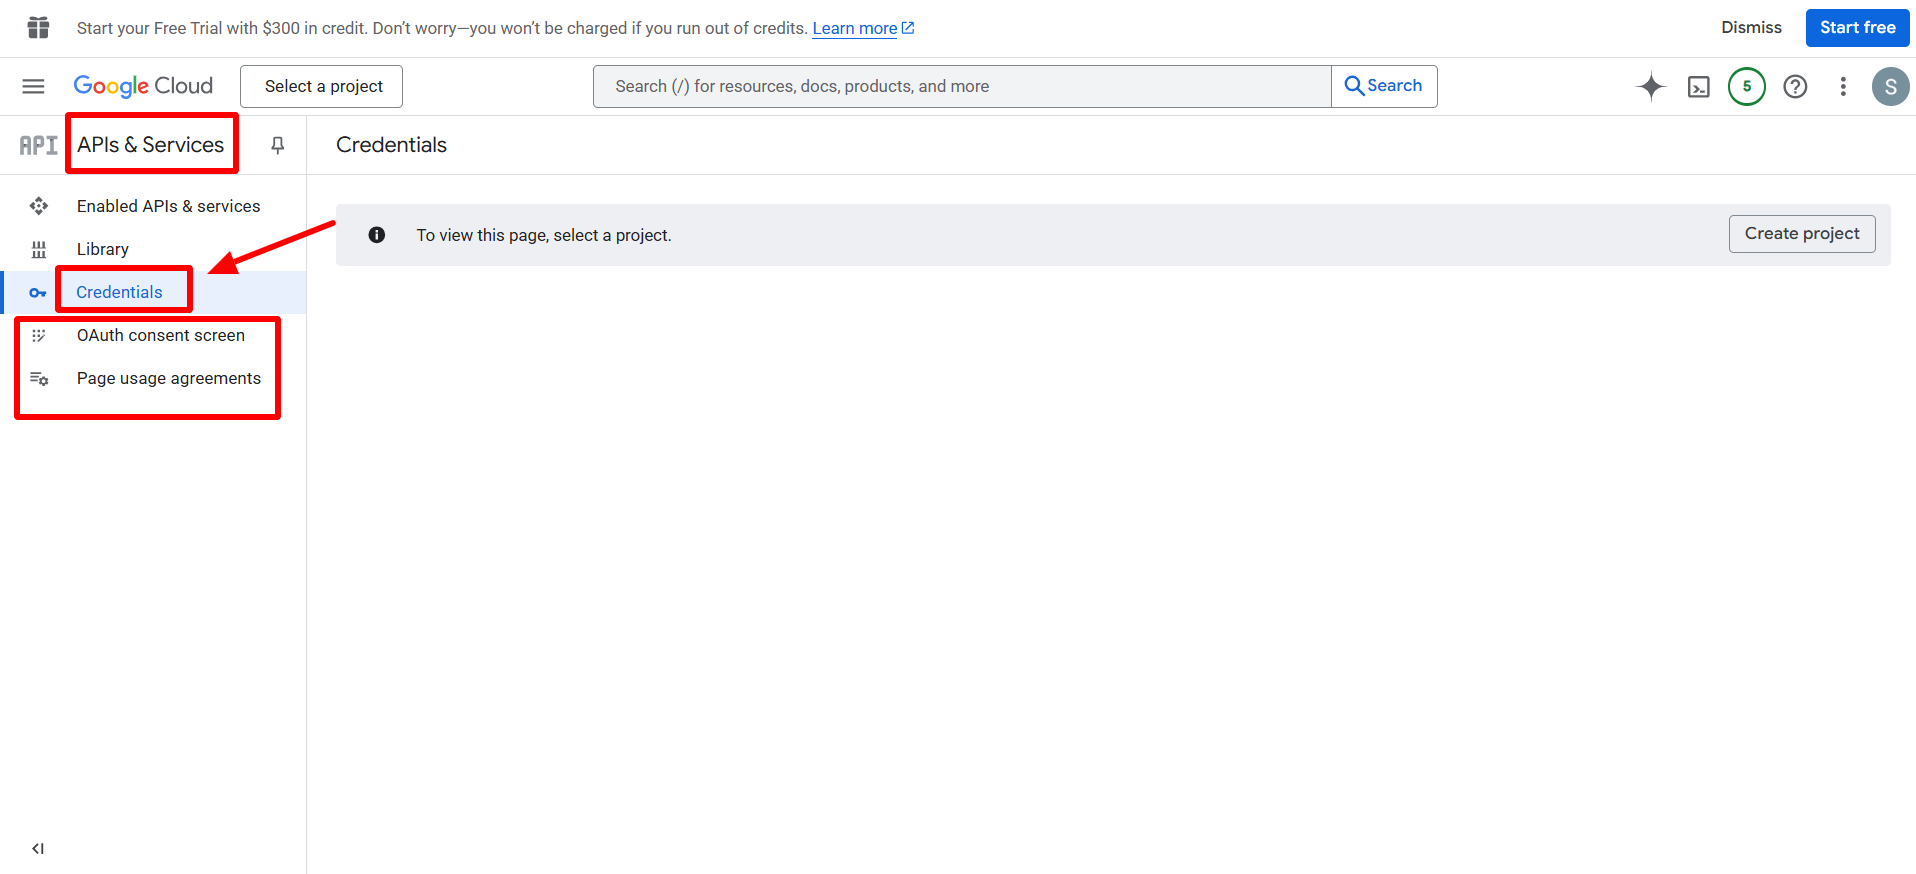
Step 4: Generate Your API Credentials
Authentication is how your app gets permission to act on behalf of a user. Google offers two primary methods: API Keys and OAuth 2.0 Client IDs. While API keys are quick to use, they offer limited access and are less secure for sensitive data. For most real-world apps, OAuth is the recommended method.
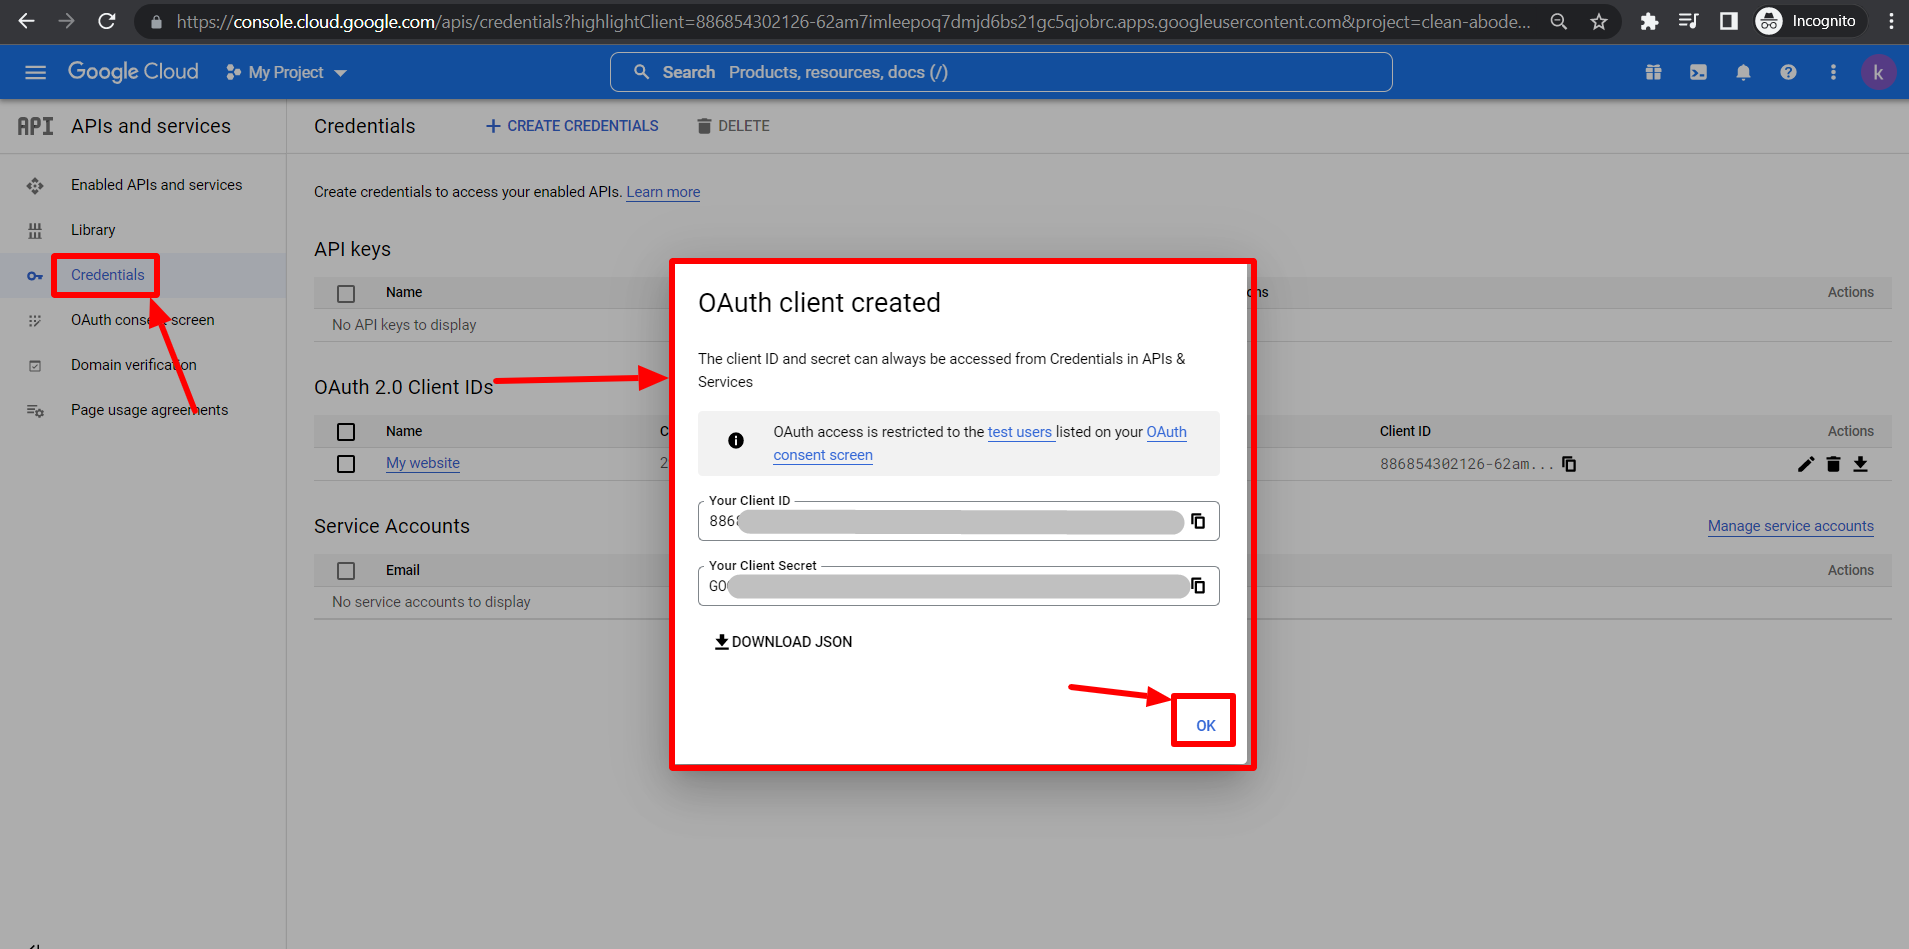
Go to APIs & Services > Credentials, then click Create Credentials > OAuth Client ID. Select the application type—e.g., Desktop App, Web App, or Mobile App—depending on your use case. Give your client a clear, identifiable name and click Create.
Once done, you can download the client_secret.json file. This file is crucial; it allows your app to authenticate users and request access tokens for various services.
Step 5: Download and Manage the client_secret.json File
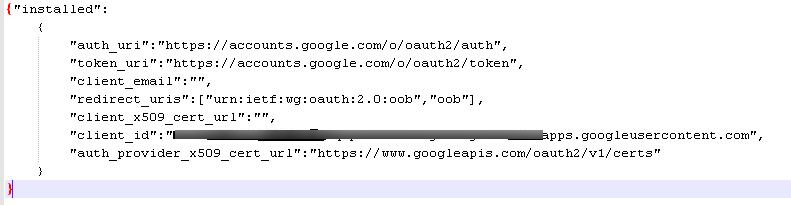
The downloaded client_secret.json file contains everything your app needs to perform OAuth authentication. Store it securely and never expose it publicly (e.g., on GitHub). If you lose the file or need to re-download it, you can always go back to the Credentials tab and hit the download icon.
This file will be used in your script or application to initiate the OAuth 2.0 flow, allowing users to authorize access. Jie Jenn recommends naming the file clearly and saving it in a secure folder related to your app’s environment.
Step 6: Authenticate and Connect Your App Using Code
With your APIs enabled and credentials in hand, you can now connect your app to Google services. Jie demonstrates this using Python, one of the most popular languages for automation.
A basic connection script requires four key elements:
- The client_secret.json file
- The service name (e.g., youtube)
- The API version (e.g., v3)
- The permission scopes (e.g., https://www.googleapis.com/auth/youtube.readonly)
Once the script is executed, it launches a browser window prompting the user to log in and authorize the app. Upon success, the app gains access to the requested services, such as exporting YouTube playlists into an Excel file—exactly as Jie shows in his example.
Final Thoughts: Start Small, Think Big
Getting started with Google APIs might seem complex at first, but once you set up your first project, things begin to click. Start with a small automation—like pulling data from Google Sheets or managing Gmail labels—and scale up from there. The modular and secure architecture Google provides ensures that you can expand your application without redoing your entire setup.
For businesses, this means custom tools, dashboards, and workflows can be developed in-house, saving time and increasing productivity.
Any questions, comments, or reactions about our article, we’re happy to hear that in the comment section below. We always love diving into healthy discussions. If you also feel that you haven’t been using Google Workspace at its best, reach us at (Cloud Sultans : contact@cloudsultans.com).
We offer free consultation or system audit to find you the best possible solution.