At Cloud Sultans, our mission is to help small and large businesses to better collaborate and achieve high productivity with their teams by maximizing the power of Google Workspace (formerly GSuite).
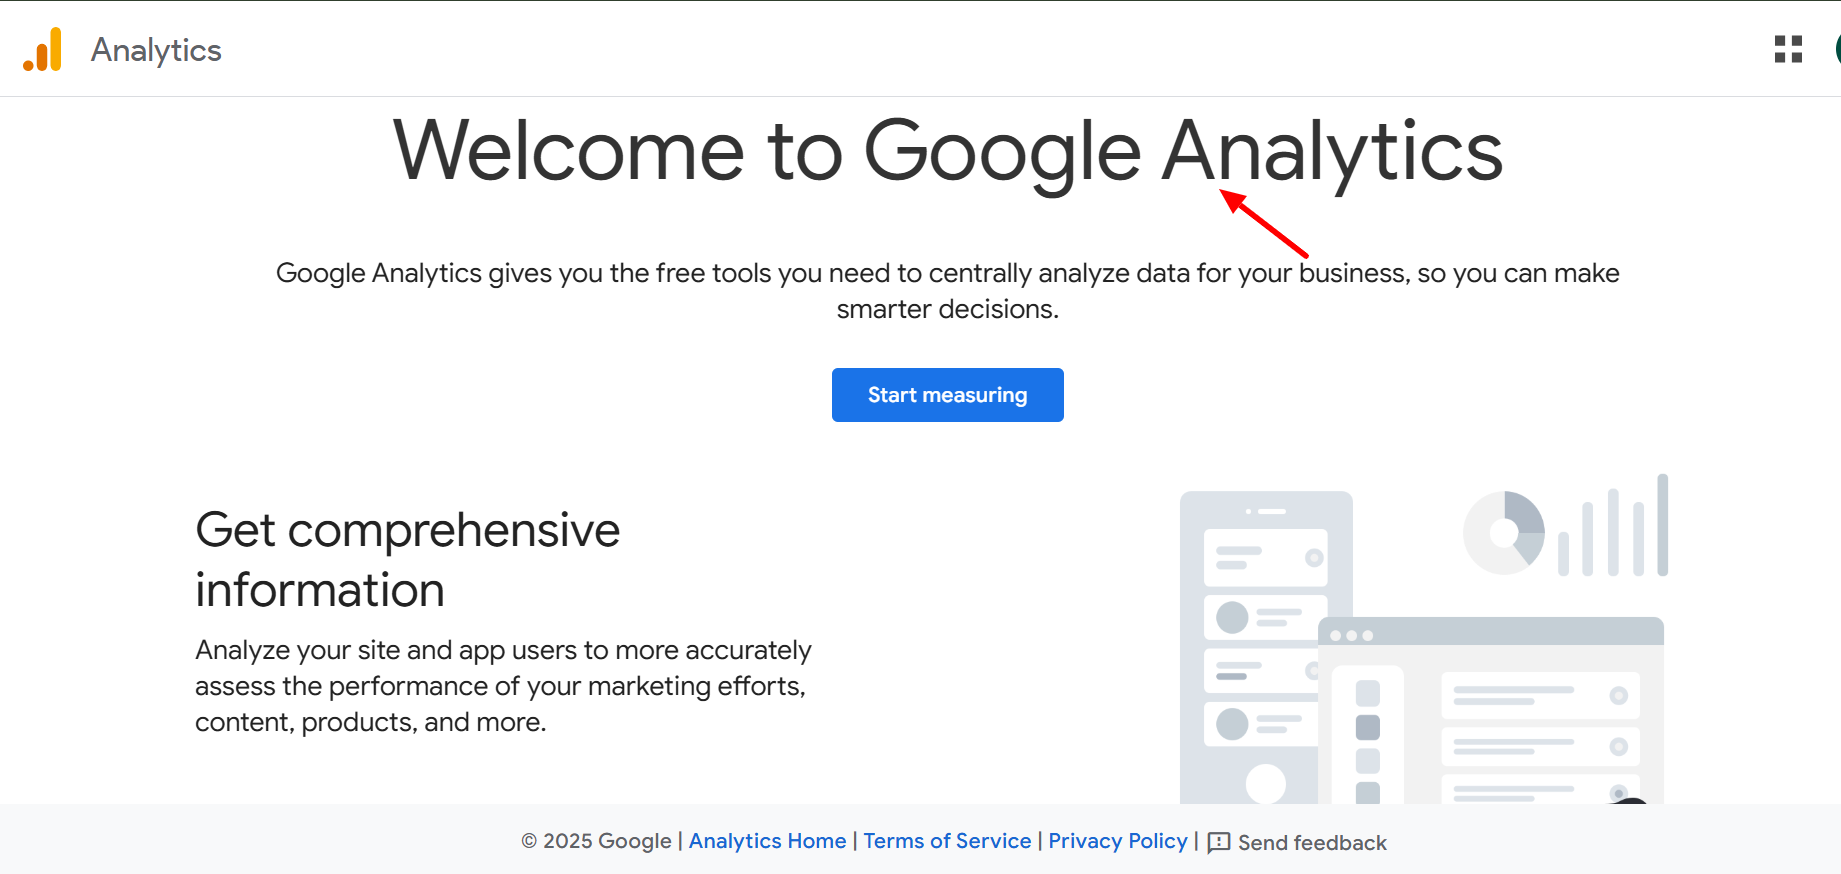
Google Analytics 4 (GA4) is Google’s latest evolution in web and app analytics, providing more flexibility, deeper insights, and event-driven tracking compared to Universal Analytics. But for new users, setting up GA4 and navigating its Admin panel can feel overwhelming. In this guide, we’ll walk you through the account setup, property creation, key admin features, and essential tips to make the most of Google Analytics 4 from day one.
1. Understanding the Google Analytics 4 Account Structure
Before diving in, it’s important to grasp Google Analytics 4’s hierarchy. At the top level, you have your Google Account, which grants access to products like Gmail, Google Ads, and Analytics. Within GA4, each Account represents an organization. An account can contain multiple Properties—each property is like a bucket for your data. Inside properties, Data Streams collect information from your website, iOS app, or Android app. This structure helps keep your analytics organized, especially if you manage multiple sites or platforms.
2. Creating Your Google Analytics 4 Account
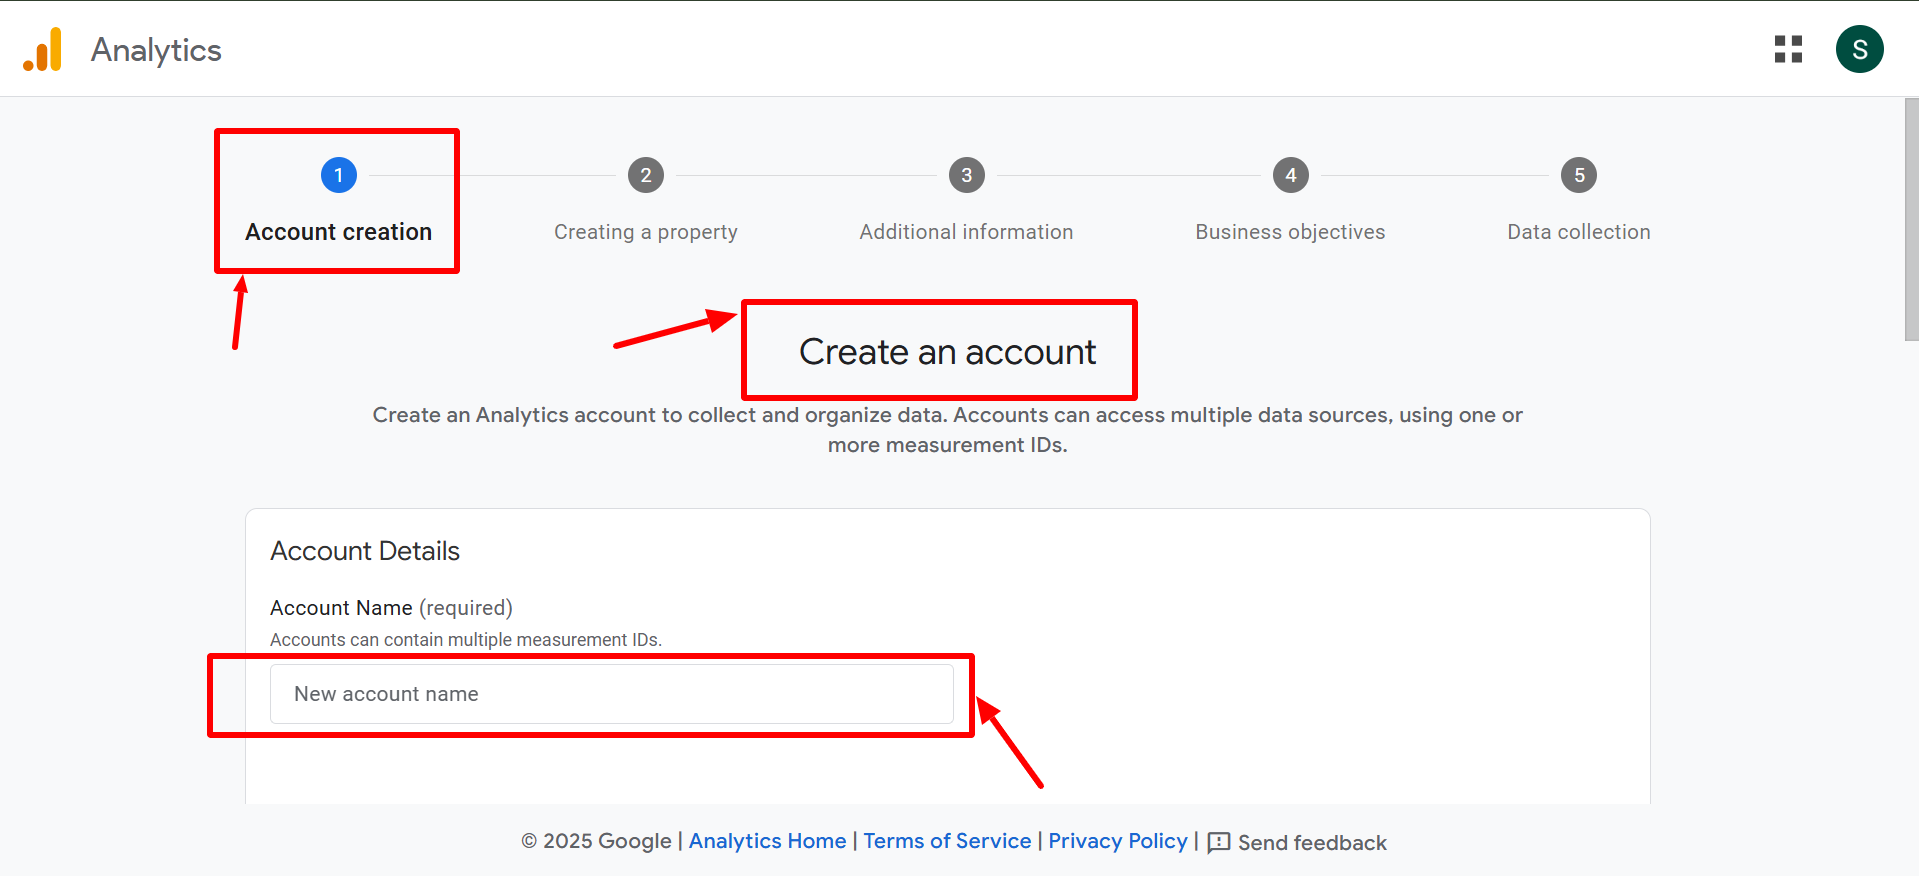
If you’re new to GA4, you’ll start by creating an account at analytics.google.com. Give your account a clear name (such as your business or project name) and review the Data Sharing Settings. Enabling features like benchmarking can help you compare performance with industry averages, but it’s optional. Once set, you’ll move to property creation.
3. Setting Up Your First Property
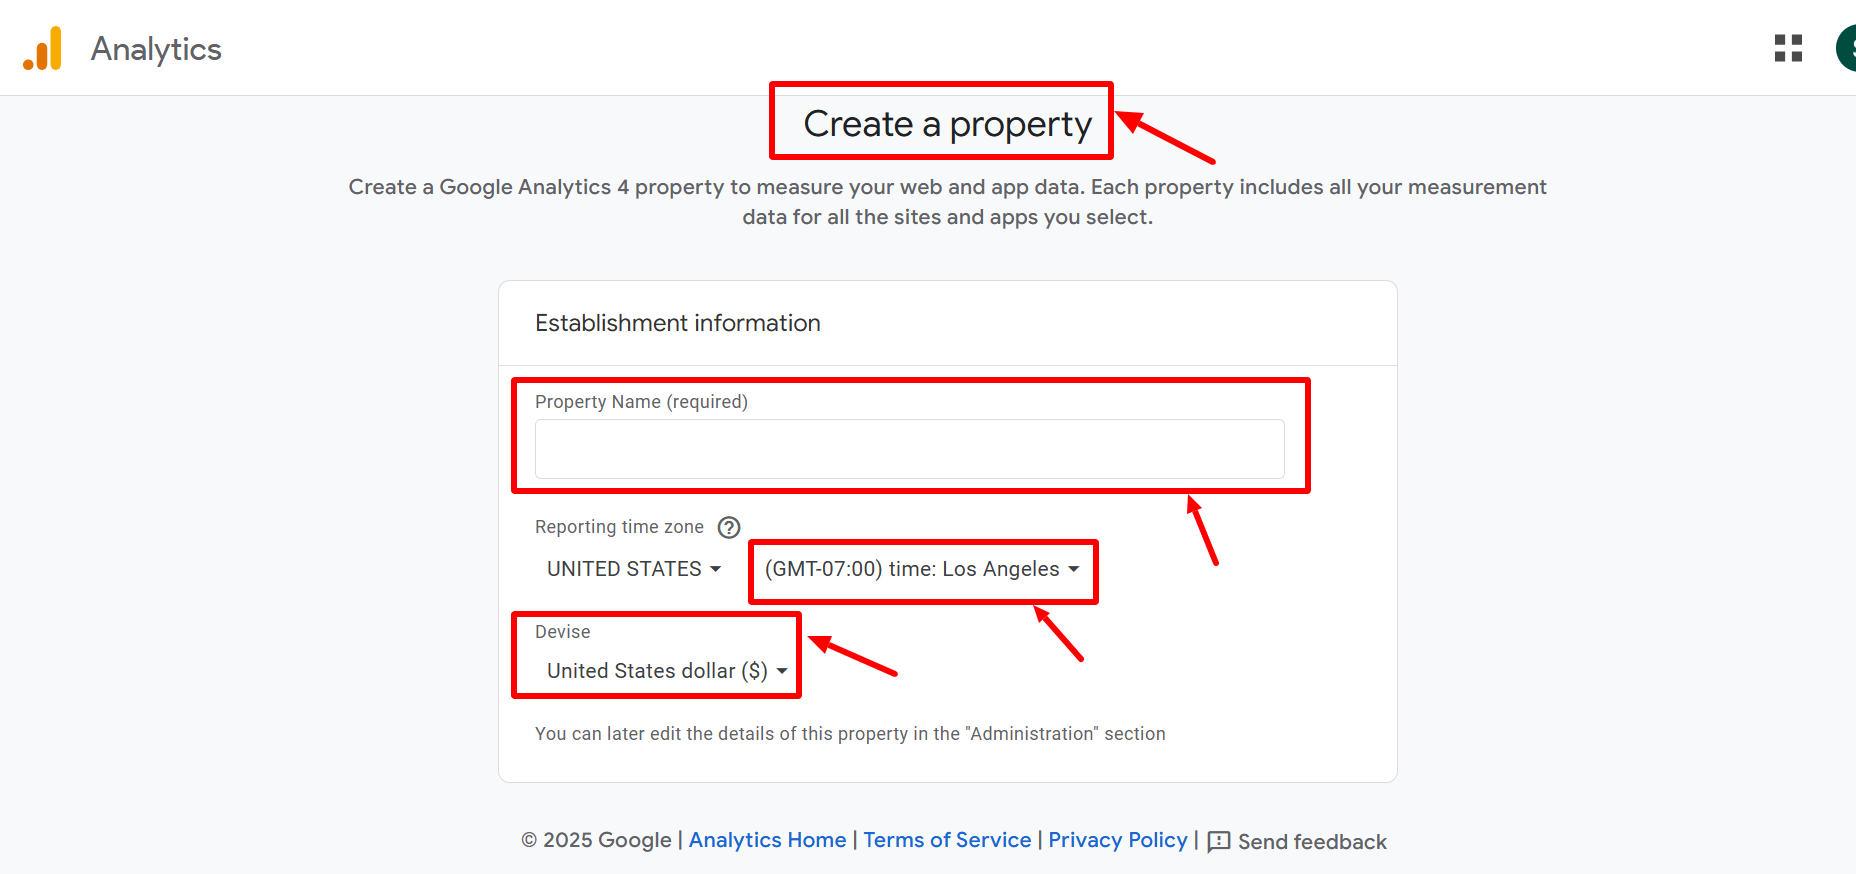
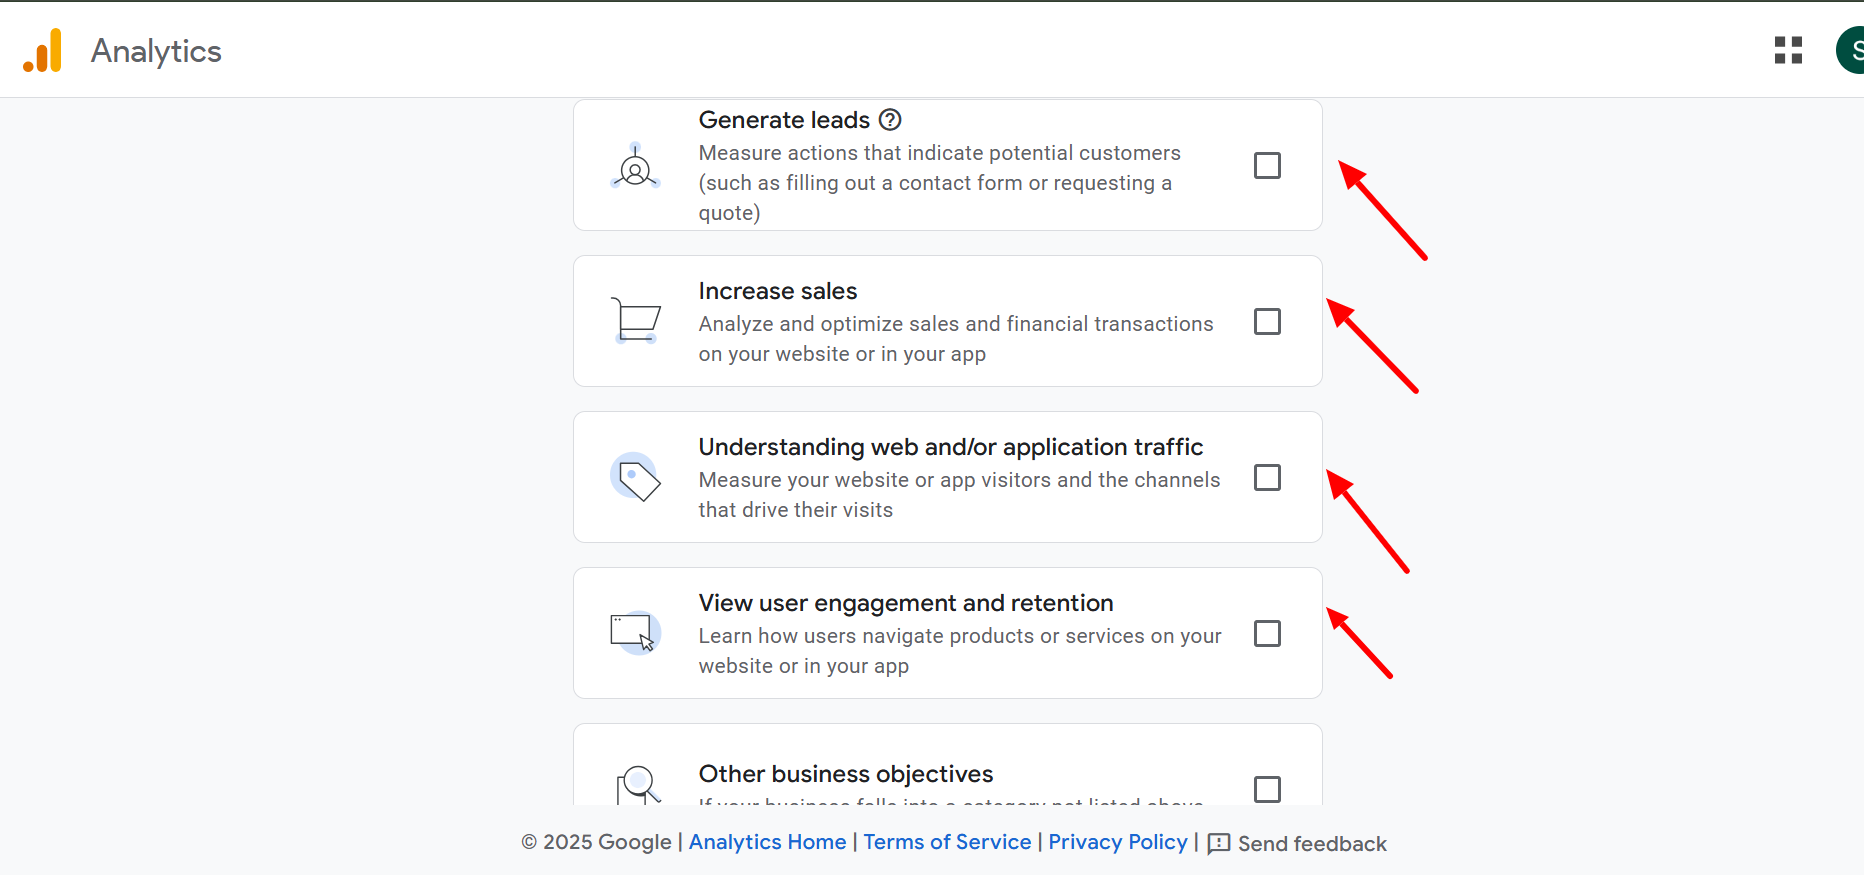
A Property stores your website or app’s data. Name it descriptively (e.g., “My Website Analytics”), choose the correct Reporting Time Zone to match your backend systems, and select your Currency. GA4 also asks for business details like industry category and size. These help customize your default reports. Choosing relevant business objectives here tailors your GA4 dashboard to your needs.
4. Creating and Configuring Data Streams
A Data Stream is the source of your tracking data. Google Analytics 4 supports Web, iOS, and Android streams. For a website, select “Web” and enter the URL and stream name. This generates your Measurement ID—a unique code that connects your site to GA4. You can add this code directly to your site’s HTML, use Google Tag Manager, or integrate through your CMS or e-commerce platform.
5. Exploring the Google Analytics 4 Admin Panel
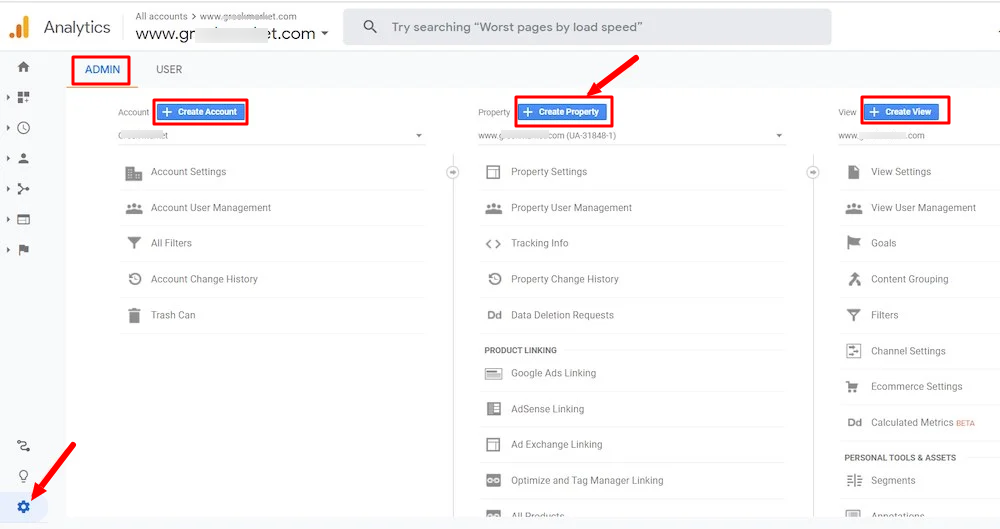
The Admin panel, accessible from the bottom-left gear icon, is split into Account Settings and Property Settings. Account settings control access, account details, and change history. Property settings control your property name, currency, time zone, and advanced configurations. Familiarity with this panel is key to maintaining your setup.
6. Managing User Access and Permissions
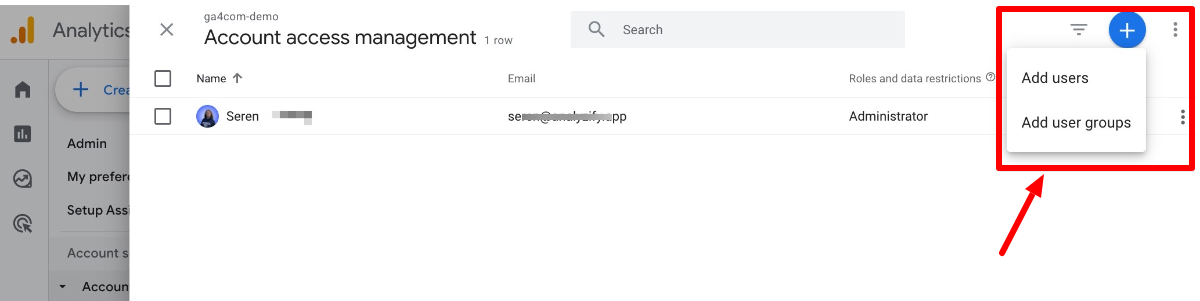
In Account Access Management, you can add or remove users and control their permissions. For example, you might grant administrators full control while giving marketers only view access. You can even hide sensitive data like revenue from specific users—important for privacy and data governance.
7. Adjusting Data Collection Settings
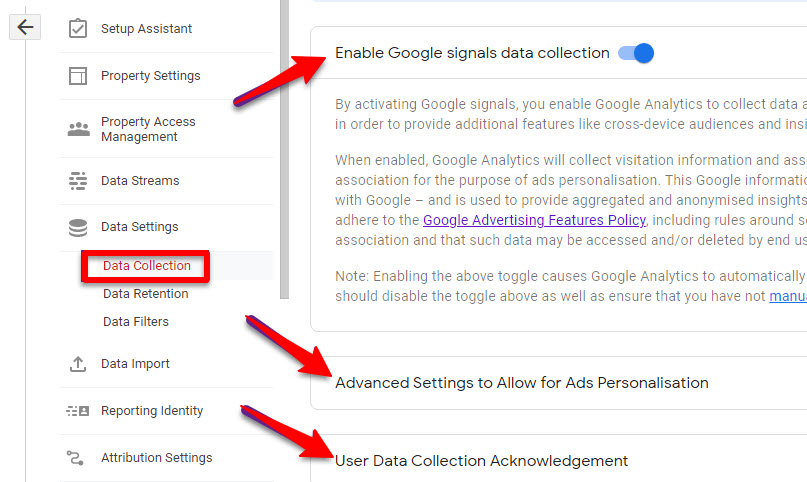
Under Data Collection, you can enable Google Signals to collect additional demographic and cross-device data (while respecting privacy rules). You can also import external data, such as ad costs or offline sales, via CSV files. If working with Google Ads, it’s better to use native conversion tracking rather than passing data back through Google Analytics 4.
8. Extending Data Retention

By default, GA4 retains event-level data for only two months in the Explore section. For richer historical analysis, increase this to 14 months immediately after creating your property. This ensures you can build year-over-year comparisons without losing valuable data.
9. Filtering Out Internal Traffic
Your own team’s activity can skew analytics. Use Data Filters to exclude internal traffic based on IP addresses. This prevents inflated metrics and keeps your reports focused on real customer behavior.
10. Highlighting Key Events
Google Analytics 4 uses Events for all interactions, from clicks to purchases. Important events—like form submissions or completed checkouts—should be marked as Key Events (formerly conversions). This allows you to track business-critical actions separately from general activity.
11. Building and Using Audiences
Audiences let you group users based on behavior, such as frequent visitors or abandoned cart users. These segments can be analyzed in GA4 or exported to Google Ads for targeted remarketing campaigns.
12. Working with Custom Dimensions and Metrics
If you send custom data (e.g., course IDs, membership tiers), you must register Custom Dimensions or Custom Metrics in GA4 to see them in reports. For advanced analysis, you can also create Calculated Metrics—for example, dividing form submissions by page views to find a conversion rate.
13. Configuring Channel Groups
Channel Groups categorize your traffic sources, such as Organic Search, Email, or Paid Ads. You can edit defaults or create custom channels to reflect unique sources, such as eBook downloads or influencer campaigns.
14. Linking with Other Google Products
Integrate GA4 with Google Ads, Search Console, or BigQuery to unlock richer reporting. Linking Ads allows you to see campaign performance directly in GA4, while Search Console integration gives organic keyword insights.
15. Setting Up Enhanced Measurement
GA4 can automatically track key interactions—like scrolls, outbound link clicks, file downloads, and embedded YouTube video plays—through Enhanced Measurement. You can toggle these on or off depending on what’s relevant to your site.
16. Configuring Cross-Domain Tracking
If your user journey spans multiple domains (e.g., shop.mysite.com and blog.mysite.com), configure Cross-Domain Tracking so GA4 treats visits as a single session instead of separate ones. This provides a more accurate view of user behavior.
17. Excluding Unwanted Referrals
To prevent checkout gateways like PayPal or Stripe from appearing as traffic sources, add them to the Unwanted Referrals list. This ensures conversions are attributed to the correct original source.
18. Adjusting Session Timeout
By default, GA4 ends a session after 30 minutes of inactivity. If your visitors often stay on a page for long periods before returning, consider extending this to several hours. You can also increase the engaged session threshold from 10 to 60 seconds for more meaningful engagement metrics.
19. Protecting Sensitive Information
If your URLs contain personal data like email addresses, use the Redact Data feature to automatically remove it from GA4. You can also add custom parameters to redact, helping maintain compliance with Google’s terms of service.
20. Using DebugView for Testing
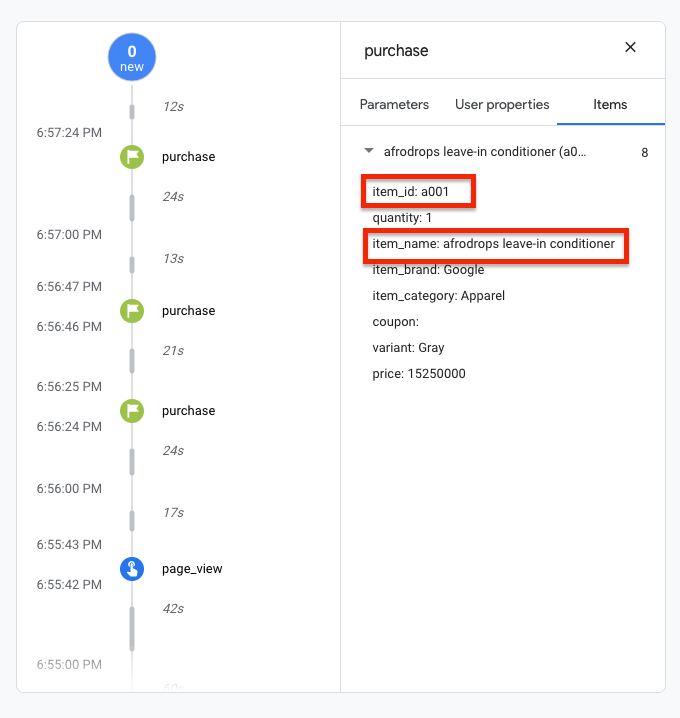
When implementing GA4, use DebugView to verify events in real time. This is invaluable for troubleshooting tracking setups before going live.
Any questions, comments, or reactions about our article, we’re happy to hear that in the comment section below. We always love diving into healthy discussions. If you also feel that you haven’t been using Google Workspace at its best, reach us at (Cloud Sultans : contact@cloudsultans.com).
We offer free consultation or system audit to find you the best possible solution.